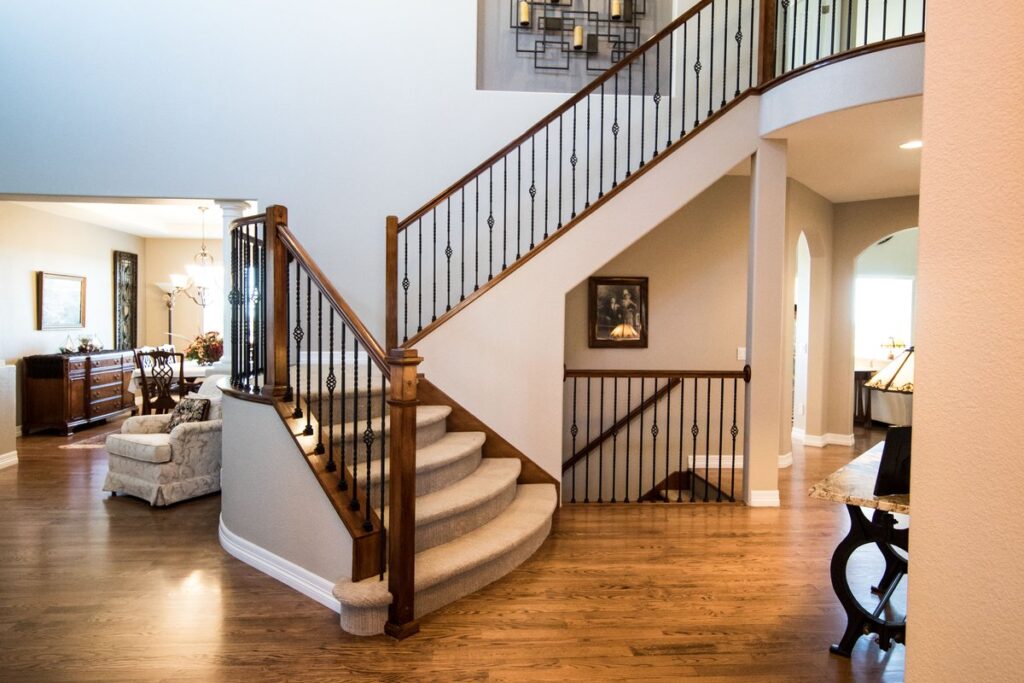
Carpeted stairs can elevate the look of your house interior and make it more classy and exotic. It’s simple on the surface, but it surely conveys a subtle message about your taste in design. However, it’s not that difficult to install carpet on the stairs as well.
You can either hire a professional service or do it by yourself. But it’s not super easy to carpet your stairs if you don’t know the right methods to do so.
To help you with that, let’s go over a step by step method on how to install carpet on stairs. That’s going to guide you through the complete process so that you don’t get frustrated halfway through.
Get the Preparations
You can’t just hop into carpeting the staircase without any preparation. Let’s check out what preparations you need to do before you start with the actual installation process.
Step 1: Measure the Stairs
The first thing you need to do is getting the perfect measurements of the whole staircase. You have to know that the end results are vastly going to depend on that one particular thing. It’s the key to the answer on how to fit a stair carpet perfectly so that it looks even throughout the whole surface.
For that, you need to note down the height, width, and length of the stairs. Try to pay attention to the smallest of details, and try to make it perfect.
Step 2: Consult with a Professional
Now that you have the measurements, now you should talk to a professional carpet salesperson to get some advice on how to do the whole thing more efficiently. You are more likely to get very helpful tips from them that are truly going to be super helpful for you in the installation process.
Besides, you can take pictures of the staircase with you, and that will give them a better understanding of what they’re dealing with there. That way, they can get more specific with tips and strategies.
Step 3: Pick a Design
After talking to an expert, it’s time to pick the design that you are going to lay on your stairs. Here you can get as much creative as you want, and that’s where you can share your taste with others. Make sure to go with something aesthetically beautiful, and also something that suits your interior design and staircases more specifically.
Again, having a picture of your staircase will help you drastically in this situation to pick the right one. You should be aware of how much to install carpet on stairs and how much you can afford as well. Don’t get overwhelmed and stay practical.
If You Want, Read More About How to Install Carpet – A Complete Beginner’s Guide
Step 4: Get the Tools
You are almost done with the preparation phase, and now it’s time to pick up the tools that you are going to need in the installation process. These tools are not that fancy, and you can easily pick these up from any local hardware store or from online.
| Carpet | A hammer | Nails | Tackles stripes |
| Industrial stapler and staples | Strips of paddings | A carpet knee kicker |
Some of the tools such as the carpet knee kicker might be completely new to you, but it’s not hard at all to use. However, if you feel like you don’t feel confident enough to use these tools, you can just hire a professional to do it for you. Otherwise, let’s go over the next segment and the steps that you can follow.
Installing Tackless Stripes
This is the first segment of the carpeting of your staircase that you need to take care of. It’s not that difficult if you follow the steps shown below, but it has a big impact on how the whole thing is going to stay put. Let’s have a look at the steps.
Step 1: Outlining the Area
First of all, it’s a great idea to outline the area that you are going to put the carpet on the staircase. You can use a pencil for that, or any erasable marker that’s not going to put permanent marks on the wood. Use a ruler or something straight as a guide to run the pencil along with to get the maximum accuracy.
Step 2: Cut the Tackless Stripes
After you get the basic outline in place, it’s time to cut the tackless stripes according to the outline area. You need to know that the stripes are what’s going to keep the carpet rooted to the stairs. So, you need to be careful with it so that it gets the best possible fit.
To do that, you should cut it 1.5 inches narrower than the stage that you are going to carpet. That’s going to keep everything in place without any unwanted misalignments. Once you are done with it, you can move on to the next steps. But make sure that you got this step right before you choose to go with something else as it’s very important.
Step 3: Finding the Center and Make Outlines
Once you’ve got the perfect tackless stripes, it’s time to find the center and use a pencil to make outlines with it. That’s going to make your life so much easier in the process and also, it’s going to make the end result so much better as well.
For that, you should use a ruler or something straight like before and use a pencil to draw lines. That’s going to give you visual cues that are going to help you get the best accuracy and better overall evenness. However, try to avoid using any permanent marker; you can certainly use HB pencils for bold and visible lines.
Step 4: Hammer it Down
Now that you are done with the outlines, you can hammer the tackless stripes into place, and that’s going to work as the anchor point. You can probably see that it’s not hard at all to hammer these stripes into the palace. You just need to align the stripes according to the outlines and use a hammer to tack the nails into each stripe.
However, if you want to get maximum stability, you should aim for a good amount of evenness in the nails and all that. It’s going to make it last longer, and prevent issues like a loose carpet shortly.
Step 5: Install Horizontal Strips
If you think that you are done by installing the first set of tackless stripes, you are wrong. Using only one set of stipes is extremely dangerous as it risks the carpet to slip, which can cause fatal injuries. So, you must add another set of strips horizontally, and that’s going to help hold the carpet into place.
It’s going to be fairly simple as the tread stripes are in place, and you can just disperse 3 to 5 nails and be done. Whatever you do, don’t skip this step of installing additional sets of stripes as it’s the most critical thing for safety.
Step 6: Additional Strips
This is the final set of strips that you need to install on the other sides. It might seem like an overdose, but you don’t know what can trigger an accident. A fatal accident can take place in a matter of seconds, and you want to avoid it at all costs. So, it’s better to do everything you can do to avoid it when you have the chance to do so.
You might wonder how long to install carpet on stairs, but it’s very important to be thorough with these things. Adding the third set of strips would make the whole thing much more safe and convenient as well. It’s a better idea to start from the top and work your way through the bottom. That’s going to be less stressful too, and you’ll get the maximum efficiency.
Step 7: Rechecking Everything
After you are done installing the tackless stripes into place, it’s time to recheck and see if everything is placed correctly or not. You should know that before you move onto the next steps, it’s important to see if anything needs any adjustments. That’s because when you start padding or laying down the carpet, you won’t be able to fix any issues with the stripes. It’s going to take immense effort on your side to fix any unevenness. So, make sure to recheck everything and see if everything is the way it should be.
Laying Carpet Runner
Once you are done with the tackless stripes, it’s time to lay the carpet runner, which is the 2nd to the last step on how to install carpet on stairs. It’s a fundamental step that’s going to determine the longevity of the whole thing, and you must get it right to maximize the endurance of your carpeted stairs. Also, it’s going to help to avoid injuries by pokey nails, which is vital as well. Let’s take a look at the steps on how to do it properly.
Step 1: Measure and Cut the Necessary Pieces
The first thing you’d need to do in this part is you need to measure and cut a piece for every single thread. Make sure that you follow the size of the tackless strips and get the exact measurements. That’s going to help to make sure that it gets maximum grip and effectiveness.
Step 2: Staple the Padding Sheets
With the pieces that you’ve got, it’s time to secure these into place. To do that you need to use a staple, which you can find in any hardware store or online. First, align the padding sheet properly and start stapling them against the tackless strips. Work your way from the bottom and move up as it’s the best strategy to get better efficiency and save time and energy as well. Once you are done with it, you can move on to the next steps.
Step 3: Tuck the Padding Under Stair Nose
In this step, you are installing horizontal padding, which is going to be fairly easy after going through the previous steps. All you have to do is to take the padding and tuck it under the nose of the step, which is going to be at a horizontal level. Also, make sure to staple properly and line up so that it doesn’t have a risk of falling or anything like that. Doing all that will make sure that you get the best possible padding done for your carpet to be in place.
Step 4: Recheck the Padding
Once again, it’s time to do a quick recheck to see if everything you’ve done so far is good or not. The first thing that you should make sure of is that you don’t see any of the tackless stripes anymore. If you see any, that means you are not done with it yet, and you have to fix it again.
However, if you see that everything is covered up pretty well, and you are pleased with the work, you can move onto the final segment of the installation process.
Laying the Carpet
This is the final phase of the installation process, and you won’t have to deal with any tricky stuff anymore. Just follow the easy steps on how to lay carpet on stairs and you’d be good to go.
Step 1: Start at the Top
You might say that this step has nothing to do with the actual installation process, but you need to follow this particular step. Starting at the top of the staircase will help you stay more relaxed and have less stress doing the installation. Therefore, you’ll have much more freedom and flexibility to do everything better.
Starting at the top has a lot of benefits as well such as gravity, easy modification of the carpet, and so on. So, it’s going to be better for you to start at the top rather than starting from the bottom of the staircase.
Step 2: Place the Carpet Runner on the Layout
If you remember that you’ve done the pencil outlines at the beginning of the project, that’s going to come into play now. The outlines will make it very easy for you to get the right size of carpet in place, and do everything from there. If you can’t get it perfect, you don’t have to worry about it now. It’s going to be covered in the upcoming steps.
For now, just place the carpet runner on top of the layout lines, and go through the following steps.
Step 3: Use the Knee Kicker
To get the carpet planted onto the stairs, the best tool to use would be a knee kicker. You can use your hands if you like, but that’s not going to give you the best results. For instance, there’d be a lot of hard to reach areas that only a knee kicker would be able to get through. However, you can always use a carpet chisel as an alternative to a knee kicker. But the knee kicker is the best option of all, and it’s very easy to use as well.
To use that, place the knee kicker on the center and start to apply pressure a bit by a bit. Don’t stop until you see that the carpet is locked in the place. As you can see, it’s very easy to use, and you’ll enjoy using it a lot.
Step 4: Verify if the Kicking is Done
After using the knee kicker, it’s time to check if it’s done with it. You need to inquire how much carpet that there’s left that might determine a lot of things in that case. For instance, you might need to unroot the whole thing to fix any issue that you’ve created, which can be very annoying to deal with. However, before you move on further, you must verify everything after the kicking is done.
Step 5: Recheck Your Work
Before you move onto the next steps, you must check the carpets and see if they are properly snugged by the stripes, and can hold still without any issue. If you don’t make sure that these are properly locked in place, that can cause issues after a bit of time. There can be issues such as bumpy carpet, loose carpet, and other irritating issues as well. So, if you find that the carpet is not properly snugged, use a chisel or any other tool to get it right in place so that it’s properly secured.
Step 6: Cut the Excess
As you are almost done with the process, you need to start refining the whole thing to have a better finish. And the most important thing you need to do in that case is cutting the excess from the carpet. You’ll find a bit of excess carpet hanging down from the bottom of the stairs or the horizontal as well. You can use a carpet knife to cut it off, and you’ll have a clean looking staircase.
Step 7: Staple Each Steps
This is the final thing you need to do to carpet your staircase, which should be looking pretty good now. To finalize everything, use a powerful stapler that’s going to let you secure the carpet in place for good. However, if you don’t have access to a powerful stapler, you can use carpet glue as an alternative to that. But the stapler is going to be a far better option than that in general, and you should go for it.
However, before you apply glue or staple, you need to make sure that everything is the way it should be. This is going to be the last chance that you’ll get to fix anything that might be bugging out. After this step, it’s not going to be possible to do quick fixes and to be real, it’ll be nearly impossible to do so.
To Wrap Up
You just went through an in-depth step by step guide on how to install carpet on stairs that you can follow through easily. But as you saw, it can be a bit of an effort for most people, especially if you haven’t done it before.
So, make sure that you follow the steps properly to avoid any kind of frustrations. And if you don’t feel like doing all that effort, you can always hire professional services to do the job for you. You’d have to pay a little money for it, but it’s well worth it. Read How to Clean Carpet on Stairs – A Detailed Guide

